Thursday, July 23, 2009

Redbubble homepage


I'm very excited to see one of my images "Light of my Life" on the redbubble Homepage. It's nice to see his smiling face beaming out to the world!

Monday, July 6, 2009

gloomy days


This one's a shot of the Ferris Wheel at Luna Park in Sydney. In October 2008 we were cruising past on a Sydney Ferry & had a beautiful view of the wheel.
It was a beautiful clear day without a cloud in the sky.

I have a bright full colour image of the Ferris Wheel with bright blue sky & vibrant colourful cars. Yeah sure, that one's lovely, but not really my sort of thing. So with this one I wanted to create something completely different, go with the grunge and get a little dark.
I'm pretty happy with the result.
Gloomy days...

chess...


I shot this in Hyde Park, Sydney on Australia Day (Jan 26) 2009.
There was so much going on in the park, lots of things to see & of course huge crowds. We all had a great time & the boys were very excited to be filmed & interviewed by a TV crew for the 6 o'clock news.....
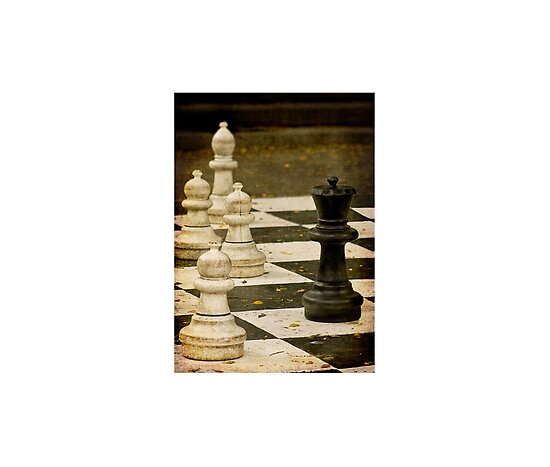
By the time we wandered past this Chess game, we were all pretty tired, so we rested there a while & watched them play.
I have no idea how to play chess, but have always fancied learning..... perhaps one day....
Chess...

Texturing an image in Photoshop

Quite a few people have asked me how I do my textured work.
To be honest, everyone does it their own way, but it helps to have someone show you how to get started.
Nicole Goggins taught me, & I believe Mel Brackstone taught her.
So here's the walkthrough that I've passed on to those who've asked.

LETS GET STARTED :

I use PhotoShop CS3, but this'll work with any version.
If you're not using PS, I'm confident you'll be able to find your way through it in whatever program you're using.

I'd suggest printing this so you can follow it step by step.


1) Start by opening the image that you want to add a texture to.

2) In the layers palette on the right, (R) click on the background layer & select "Duplicate layer". This layer will be called "Background copy", & will sit immediately above the "background" layer. (This is to preserve your original copy)

3) Do whatever adjustments you would usually do until you're happy with the image as it is. ( ie - levels, curves, hue/sat, curves etc )

4) Flatten the image -
To do this, go to the Layers palette (R) click on a layer, & select "Flatten image".

5)Now it's time to apply the texture image.
First, you need to make sure that your texture image is the same size as your background image.
To do this :-
Go to your top toolbar & look for the "Image" tab, & click on it.
Then click on "Image Size".
You'll need to write down the following details : Pixel dimensions - Width & Height , & Resolution.
Click OK or Cancel to close that window.

6) Now go to your top tool bar, click on "File" & "Open" your texture image.

7)Now that you're in your texture image, go to "Image", "Image Size" again, & make sure "Resample Image" is checked, & "Constrain Proportions" is unchecked..
In that same window, change the resolution & Pixel dimensions - Width & Height to the same details that you wrote down earlier.
Click "OK".
Now your texture image is the same as your background image.

8) Minimize the texture image. Do not close it, just minimize it.
Now you should see your background image workspace again.

9) In your background again, go to your layers palette & create a "Background copy" like we did in step (2).

10) Go to the little toolbar on the bottom of the "Layers Palette" & look for the little icon that looks like a square with the bottom left corner turning up.
This is the "Create new layer" button.
Click on this & create a new layer, which you can rename to "texture".
Make sure this layer is active. ( it'll be highlighted in grey)

11) Go to "Image", then "Apply Image".
Now you'll see a window with a dropdown box named "Source" at the top.
Look for your texture image in the dropdown box , select it, & click "OK".
You'll see the texture appear in the "texture" layer that you created in step (10).

Now it's time to get creative.....

12) In the layers palette double click on the little thumbnail image of your texture.
You'll get a window called "Layer Style".
Under "Blending Options", "General blending" you'll see that the current blend mode is "normal".
Click on this dropbox & start experimenting with the different blend modes.
I usually use "overlay", "soft light", or "hard light".
This whole "Layer style" window is one you can experiment with as much as you like until you come up with the look you want.
Click "OK" when you're done.

13) You can change the blend mode of your background copy also.
At this stage you just need to be doing whatever you want to achieve the look you like.

14) For a bit more depth to your texturing, you can try duplicating each layer, & then alternate their order on the palette by dragging them up & down.
eg :- texture copy
background copy 2
texture
background copy
background (this one is locked, so will always remain on the bottom)

15) In the Layers palette you can adjust the "opacity" of each layer for more or less of the effect.

16) Don't forget to save as you go.
I like to save all my layers as a psd (Photoshop document) so that I can make changes to it at any time in the future.
When you have a final image that you like, flatten the image ( as in step 4), & "save as" a jpeg. (or your preferred format)

17) Upload to your favourite online gallery so that we can all see how well you've done!!!!

And that's it!

Just remember that there's no "rules" for this..... a lot of it is just experimenting as you go. What works for one image might look horrid on another, so trust your instincts!

Good luck!!