Wednesday, October 28, 2009

Photoshop - Working with layers - The Basics

I was recently asked to explain how I use layers in Photoshop. So while trying to put my thoughts together, I decided I might as well share it with everyone who’s interested.

I’ll show how to do very basic adjustments so you get a feel for how layers work. Once you’re comfortable with that you can move on to using layers to create art effects.

Please keep in mind that I’m a Photoshop user... I’m in no way an expert!
This is just my way of working with layers. There are many different ways, & they all work.

Why use layers ? :
Our reasons for using layers are many & varied. We might be doing vector-like illustrations, Or composing an intricate fantasy photomanipulation.
It may be a simple matter of applying text over an image.
You may just want to do basic tone & colour adjustments of your photographs.
Whatever your reason, using layers is almost essential.
I say this for one very important reason. If you apply adjustments of any type to your original image, you will be altering it permanently. There’s no going back. Pixels get moved around & destroyed, every brush or keystroke seriously alters the quality of your image.
However, working in layers is non-destructive. The original image sits at the bottom of your stack, untouched, unaltered, safe from damage.
All of your edits are stacked on top of the original, & then “flattened”, usually upon completion, or when you’re ready to move on to the next stage of editing.

I’ll use this image of a bunch of people looking a Trojan warplane, to demonstrate the basics of using layers.

I’m using PS CS3, & I’m not sure how similar the layout of PS Elements is, so this will either be helpful to you, or just confusing…. it should be fairly similar though.

Let’s get started :

1) Open your image in Photoshop, & save it straight away as a psd (Photoshop file format) I’ve decided to call this one “enter the trojan”.

2) Now have a good look at the image & decide what needs doing.
Does it needs cropping? Some people choose to crop at the start, but for some strange reason I’ll often wait until I’m somewhere through my editing process. I like to wait to see how the image is evolving….

Does anything need cloning out?
This image has a rather annoying person disappearing out of the left side of the frame, so Ill be getting rid of him, as well as cleaning up a few distracting white spots on the airfield in the background.

3) Look to the right of your screen & you’ll see your layers palette.
At the top right of that you’ll see 3 little horizontal lines stacked on top of each other with an arrow next to them. Left click on this & you’ll get a drop-down box. this is your most important box for using layers.

Click on duplicate layer, & rename it as you wish.
I’m calling it “clone”.

You’ll see the duplicate layer appear above the background layer in your layers palette.

Make sure the clone layer is selected (it’ll be highlighted in grey), & you’re ready to work on that layer.
Now select your clone tool & go to work.

All done? If you’re happy with your work make sure you save.

Now, remembering what I said about your background (original) layer remaining untouched, here’s a little demo.
Do you see that little eye beside your “clone” layer?
Click on it…. Hello!! Your cloning has gone! Click on it again….. it’s back!!!
OK, we could have fun with this all day, but do you see how the background image is unchanged? Cool huh?

Let’s move on….

I’ve got blown out highlights in my clouds which are a problem & the mid-tones are a bit too dark.
I’ll deal with the clouds first by using a curves adjustment layer.

4) All the way down at the bottom of your layers palette, you’ll see a toolbar. look for the circle that’s half black & half white.
This is the “create new fill or adjustment layer” button.
Click on it & select “curves”.

5) Grab the little white dot on the line in the top right corner. Now drag it a smidgen down to the right. That should take care of the blown out clouds.
Click OK.

Do you see you now have a curves layer?
(Because I use CS3, it automatically gives me a layer mask box on this layer. It’s that white box in your curves layer. But we’re not going to get into masks today)

Now to fix the mid-tones. For this I’m going to add a Levels layer.
6) Just like in step 4), click on the “create new fill or adjustment layer” button & this time select “Levels”.

7) This will open a box with a levels histogram in it.
To lighten your mid-tones slide the grey arrow in the middle of the histogram to the left until you’re happy.
Click OK, & you’ll see your levels layer sitting above the curves layer.

Now, what if you wanted to do some dodge & burn?
There’s a number of ways to dodge & burn, so I’ll show you one that I use quite often.

8) Remember those 3 little horizontal lines that you clicked on to duplicate the layer? (step 3)
Click on that again, & this time select “New Layer”.

9) In the dialogue box, change the name to “dodge & burn”,
click on the “mode” dropdown box, & select “overlay”,
then check the box “Fill with overlay-neutral color (50% gray)
it should look something like this :

Then click OK.

You’ll now see a layer called “dodge & burn” in your layers palette. It should be on the top of the pile. If it isn’t, simply drag it to the top.
Any work you do to the top layer will be carried over to all the layers below.

10) Select your burn tool, set your range to Shadows, & Exposure around 20 (this will depend completely upon the type of image you’re working on), then get to work burning out the areas that you feel need deepening.

11) Then take your dodge tool, set your Exposure to around 20 & work over the areas that you think need a little more highlighting.

I’ve decided this image needs a bit more saturation.

12) Go back to the black/white circle (as mentioned in step 4), & this time look for Hue/Saturation.

Adjust your sliders as you see fit, then click OK.

At this stage I’m happy with my basic adjustments. It’s now at the stage where it’s ready for me to use it as a background image for something a little more creative.

13) If you haven’t been saving until now, you really must do it now.

14) Now we’re going to Flatten the file.
Go to those 3 little horizontal lines with the arrow again (step 3), & this time look for “Flatten Image”.

Click on it. You’ll see that all your layers have been “flattened into just one layer, & it’s now become your new background layer.

If you’re planning to print this, you’ll need to give it some sharpening.
There are so many ways to sharpen, but at the moment I’m a bit partial to using the “high pass” filter.

15) To do this you’ll need to use a duplicate layer (remember step 3?)
I’m re-naming it “High Pass Sharpening”.

16) Go to your “filter” drop down box on your top tool bar, & select, “other”, “high pass”.

17) Adjust your radius slider until you see a good amount of line detail while keeping the tones in gray. Click OK.

You’re probably wondering what’s happened to your image. We’ll fix that right now.

18) Look above your “high pass” layer, & you’ll see Opacity set at 100%, to the left of that the word “normal” in a drop-down box.
Click on that drop-down box & select “overlay”.

Presto! You’ve got your image back, & it’s been sharpened.
Toggle the “eye” off & on to see the effect.

19) If it’s too sharpened for your taste, you can adjust the opacity of that layer.
Find the “opacity” slider above the layer, & adjust it as you like.
I’m setting this one to 50%.

20) Save this as a new psd file ( I’m calling this one “enter the trojan HP sharp”), & flatten it as before.

21) Now all you need to do is save it in the Format of choice.
I routinely save all my images as TIFF files, & then save again as JPEG.
Remember to do all you backups now so you don’t forget later.

All finished! Now you have an image that is fine as is, or ready for you to get a little creative & do further editing.
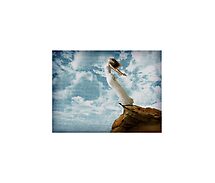
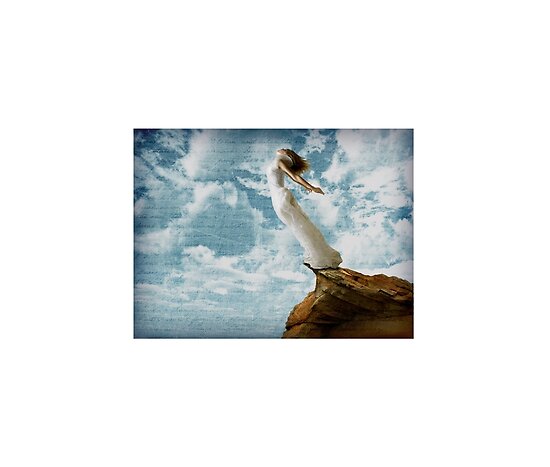
The final image :

You might also want to look at Texturing an Image in Photoshop for Absolute Beginners for further editing ideas.

[ One last point : I put a lot of time & effort into creating these tutorials. Please don’t disrespect me by claiming them as your own.]

Monday, August 24, 2009

3 wise monkeys


This is the result of one of those times that your brain wakes you at 2 am to tell you that it’s had a good idea. Then it insists on telling you exactly how to make this idea a reality. I eventually got back to sleep & began following my brain’s instructions soon after breakfast…..

We’re all familiar with those Three Wise Monkeys who together embody the principle of “See no evil, Speak no evil, Hear no evil”.

This principle is commonly regarded to be of Japanese origin, however is most likely to have come to Japan from China in the 8th century.

This is my interpretation of “See no evil, Speak no evil, Hear no evil”.
Credit must go to my son who was very willing to be my model. Apparently it was lots of fun doing the poses!

Wednesday, August 12, 2009

My son turns 5 .... where did the time go?


My son recently turned five years old. A milestone of sorts for him; an enormous one for me! Why? Because I'm wondering where on earth the past five years has gone.
How did my beautiful newborn become a boy full of boisterous energy & cheeky enthusiasm for life?
He was a beautiful baby. Every parent says that, & so they should. But I truly believe he was. We had waited so long for him, there was no way he'd be anything but beautiful.

Nine years of infertility is quite a build-up to the birth of your first child. All the years of thinking that you're not really infertile... "If we just wait a little longer, it might happen."
Of course the years kept ticking by & it didn't happen. It took us a while to accept that IVF was going to be our only chance at parenthood. We eventually made the decision to try IVF. Once the decision was made we didn't waste any more time.
We were lucky with the treatment; we tried it once & it worked. So many others aren't so lucky. We were so relieved to not have to endure all that stress again..... there's a lot of emotional pressure in IVF.

So, after nine years, we found ourselves pregnant; a baby was actually on the way.... YAY!!
He was kind enough to be a troublefree foetus, giving me the opportunity to love every minute of pregnancy.
Birth was much like the pregnancy; a pleasure! five & a half hours of labour, with an epidural for pain relief... as I said, a pleasure.

Once he was born he started growing & hasn't stopped. He has always been taller than his peers, & at five years old, already stands up to my chest. Nipple height to be precise; a fact that he finds highly amusing.
I can only imagine how tall he will be when fully grown.

He's cheeky. Not in one of those rude, bad mannered ways, but cheeky in the mischievous, fun loving sense. He loves to laugh, he loves to tickle, & loves to play tricks.

Perhaps what I love about him the most is his great sensitivity. He's always considerate of the feelings of others, & so giving of his hugs & kisses, kind words... What more could a Mother ask for but to have a son who loves without reserve, who gives of himself without resentment or expectation.

Five years has come around so fast, who knows where it's gone. but the child I see before me is someone that I am so proud of, someone that I love so much, that I look forward to the next fives years with eager anticipation....
though don't come too fast please.

Friday, August 7, 2009

Of Precious Things & Strange.....


When I decided to study nursing in the late 80’s, my Grandmother; who had been a nurse herself during the war years; gave me her old nursing text book, thinking that I might get some use from it.
As a nursing text it was an amusing way to learn all the things not to do, but for a peek into the past, it was priceless.
It is inscribed inside the cover with her name, the date – 1932, & the hospital at which she did her Nursing training.

While leafing through the pages this afternoon I discovered this little gem, that I have never previously come across….

A new chapter – Bacteriology – begins. Words on the page like bacterium, microbe, pathogen, stagnant pools[???]....
But also; pressed lovingly between the pages; the remnants of a daisy flower & leaf, & a hand written note pertaining to “paroxysmal tachycardia”, & numerous other notations in the various margins, scribbled in pencil, obscure references to other strange states of health.

Only my grandmother would know the truth of this page….. only she knows what made her secrete a once beautiful bloom there, amongst the stagnant & diseased.

I feel like I’ve stumbled upon some bizarre time capsule….....

not so bizarre really…. just a touching reminder of someone once & still greatly loved.

Grief of a Myna


Indian Myna birds mate for life. We’ve been watching this bird & it’s mate living in our garden for the past month. Myna’s are considered pests in Australia, but they’ve been no concern to us, & they’ve become noisy but welcome guests at our home.

Early this morning my 2 yr old son approached me very distressed, taking me by the hand & leading me to our back fence, where he showed me one of the Myna birds stuck in the fence. It had caught it’s leg between the palings & being unable to free itself, had unfortunately died overnight.
Under the watchful eye of my son, I removed the bird, & began to wrap it with the intention of putting it in the bin.
This made my son quite distressed & left me with a small dilemma… Do I casually dispose of the dead bird & continue my day, or do I attempt to explain death to a 2 yr old in the face of his first experience of it?
I took a deep breath & chose the latter option… albeit an abridged version of death.
Instead of throwing the bird in the bin, I asked my son if he wanted to bury it instead. He had no idea what burial was, but somehow understood that this was a nicer option for the bird.
So, spade in hand, we dug a decent hole, placed the bird in, my son waved goodbye, then we covered the bird…. burial complete, & my son content .

Which brings me to the bird in this image. As I previously mentioned, this is the mate of the dead bird. For the whole time that we were burying it’s mate, this bird stood on the ground 10 feet from me & watched the entire process.
Upon completion of the burial, this bird flew to the place on the fence where it’s mate died, & spent the rest of the morning sitting there alone, calling mournfully. A sad & sorrowful sound, I can assure you.
I was able to snap this photo during it’s grieving vigil.

word of the day

hebetude : Mental dullness or sluggishness

sounds like me for the past 5 years..... ever since the birth of child no. 1.... baby brain doesn't go away apparently.....

Thursday, July 23, 2009

Redbubble homepage


I'm very excited to see one of my images "Light of my Life" on the redbubble Homepage. It's nice to see his smiling face beaming out to the world!

Monday, July 6, 2009

gloomy days


This one's a shot of the Ferris Wheel at Luna Park in Sydney. In October 2008 we were cruising past on a Sydney Ferry & had a beautiful view of the wheel.
It was a beautiful clear day without a cloud in the sky.

I have a bright full colour image of the Ferris Wheel with bright blue sky & vibrant colourful cars. Yeah sure, that one's lovely, but not really my sort of thing. So with this one I wanted to create something completely different, go with the grunge and get a little dark.
I'm pretty happy with the result.
Gloomy days...

chess...


I shot this in Hyde Park, Sydney on Australia Day (Jan 26) 2009.
There was so much going on in the park, lots of things to see & of course huge crowds. We all had a great time & the boys were very excited to be filmed & interviewed by a TV crew for the 6 o'clock news.....
By the time we wandered past this Chess game, we were all pretty tired, so we rested there a while & watched them play.
I have no idea how to play chess, but have always fancied learning..... perhaps one day....
Chess...

Texturing an image in Photoshop

Quite a few people have asked me how I do my textured work.
To be honest, everyone does it their own way, but it helps to have someone show you how to get started.
Nicole Goggins taught me, & I believe Mel Brackstone taught her.
So here's the walkthrough that I've passed on to those who've asked.

LETS GET STARTED :

I use PhotoShop CS3, but this'll work with any version.
If you're not using PS, I'm confident you'll be able to find your way through it in whatever program you're using.

I'd suggest printing this so you can follow it step by step.


1) Start by opening the image that you want to add a texture to.

2) In the layers palette on the right, (R) click on the background layer & select "Duplicate layer". This layer will be called "Background copy", & will sit immediately above the "background" layer. (This is to preserve your original copy)

3) Do whatever adjustments you would usually do until you're happy with the image as it is. ( ie - levels, curves, hue/sat, curves etc )

4) Flatten the image -
To do this, go to the Layers palette (R) click on a layer, & select "Flatten image".

5)Now it's time to apply the texture image.
First, you need to make sure that your texture image is the same size as your background image.
To do this :-
Go to your top toolbar & look for the "Image" tab, & click on it.
Then click on "Image Size".
You'll need to write down the following details : Pixel dimensions - Width & Height , & Resolution.
Click OK or Cancel to close that window.

6) Now go to your top tool bar, click on "File" & "Open" your texture image.

7)Now that you're in your texture image, go to "Image", "Image Size" again, & make sure "Resample Image" is checked, & "Constrain Proportions" is unchecked..
In that same window, change the resolution & Pixel dimensions - Width & Height to the same details that you wrote down earlier.
Click "OK".
Now your texture image is the same as your background image.

8) Minimize the texture image. Do not close it, just minimize it.
Now you should see your background image workspace again.

9) In your background again, go to your layers palette & create a "Background copy" like we did in step (2).

10) Go to the little toolbar on the bottom of the "Layers Palette" & look for the little icon that looks like a square with the bottom left corner turning up.
This is the "Create new layer" button.
Click on this & create a new layer, which you can rename to "texture".
Make sure this layer is active. ( it'll be highlighted in grey)

11) Go to "Image", then "Apply Image".
Now you'll see a window with a dropdown box named "Source" at the top.
Look for your texture image in the dropdown box , select it, & click "OK".
You'll see the texture appear in the "texture" layer that you created in step (10).

Now it's time to get creative.....

12) In the layers palette double click on the little thumbnail image of your texture.
You'll get a window called "Layer Style".
Under "Blending Options", "General blending" you'll see that the current blend mode is "normal".
Click on this dropbox & start experimenting with the different blend modes.
I usually use "overlay", "soft light", or "hard light".
This whole "Layer style" window is one you can experiment with as much as you like until you come up with the look you want.
Click "OK" when you're done.

13) You can change the blend mode of your background copy also.
At this stage you just need to be doing whatever you want to achieve the look you like.

14) For a bit more depth to your texturing, you can try duplicating each layer, & then alternate their order on the palette by dragging them up & down.
eg :- texture copy
background copy 2
texture
background copy
background (this one is locked, so will always remain on the bottom)

15) In the Layers palette you can adjust the "opacity" of each layer for more or less of the effect.

16) Don't forget to save as you go.
I like to save all my layers as a psd (Photoshop document) so that I can make changes to it at any time in the future.
When you have a final image that you like, flatten the image ( as in step 4), & "save as" a jpeg. (or your preferred format)

17) Upload to your favourite online gallery so that we can all see how well you've done!!!!

And that's it!

Just remember that there's no "rules" for this..... a lot of it is just experimenting as you go. What works for one image might look horrid on another, so trust your instincts!

Good luck!!

Friday, February 6, 2009

Learning to Fly


Do you ever have the urge to jump from a cliff? Not in one of those tragic bad ways…. I’m talking about that feeling of wanting to free yourself, break the chains of whatever binds you…... just to let yourself go…...

Thanks to Kelly Clarkson & her song “Breakaway” for planting this persistent image in my head…...

Grew up in a small town
And when the rain would fall down
I’d just stare out my window
Dreaming of what could be
And if I’d end up happy
I would pray

Trying hard to reach out
But when I tried to speak out
Felt like no one could hear me
Wanted to belong here
But something felt so wrong here
So I prayed I could break away

I’ll spread my wings and I’ll learn how to fly
I’ll do what it takes til’ I touch the sky
And I’ll make a wish
Take a chance
Make a change
And breakaway
Out of the darkness and into the sun
But I won’t forget all the ones that I love
I’ll take a risk
Take a chance
Make a change
And breakaway

Wanna feel the warm breeze
Sleep under a palm tree
Feel the rush of the ocean
Get on board a fast train
Travel on a jet plane, far away
And breakaway

Buildings with a hundred floors
Swinging around revolving doors
Maybe I don’t know where they’ll take me but
Gotta keep moving on, moving on
Fly away, breakaway…..


  1. model stock : Faestock
  2. rock stock : night-fate-stock
  3. metal scratches textures x 2 : cgtextures
  4. other stock my own


Ultimate Bliss


There’s nothing I love more than a cup of Darjeeling tea…. or green tea….
I’ll have tea before anything else. It’s always the first thing I reach for.
If I feel snackish I head for the tea, if I’m sad & lonely I head for the tea, If I’m stressed & need to relax… tea, If I’m cranky & angry….tea.
There’s just nothing better.

  1. Top Ten Finish – Girl’s Best Friend – March 2009
  2. Top Ten Finish – My Favorite Things – June 2009


The Submariner


When my Husband saw this RAW image of Jack he thought he looked like “a disgruntled Russian sailor”.
That afternoon I met a charming elderly gentleman with a heavy Eastern European accent & a disarming smile.
Two Russian references in one day? OK! I got the hint!!

Meet The Submariner.

This one is best viewed large at RedBubble.

Textures from CGTextures.

  1. Featured – The Grunge Art Gallery January 2009
  2. Featured – Australian Portraits February 2009
  3. Featured – Images & Ideas March 2009
  4. Top Ten finish – Staged.. Set-up Challenge – April 2009
  5. Top Ten Finish – Head-On Faces challenge – July 2009
  6. Featured – Layered with Texture – March 2010
  7. Top Ten FinishLayer it With a Child – March 2010


Grocery Store


On the NSW South Coast is a gorgeous little village called Central Tilba.
Tilba is a heritage listed village full of quaint little galleries & craft shops, a cheese factory (heavenly) idyllic temperatures, and dairy cows grazing on the hills.


The Grocery Store (which sells divine home-made fudge) has a bicycle hanging above the front door. I thought this an odd place to hang such a thing, and yet somehow it seemed completely normal there. It just seemed to be right at home amongst the quaintness of the place.